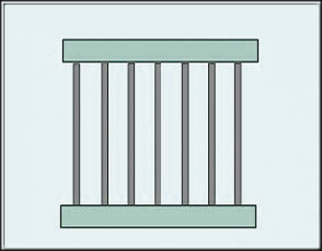
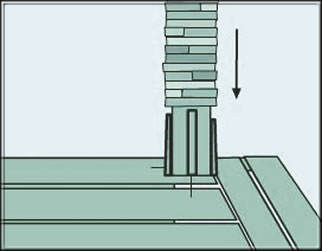
| STEP 1 - Secure Posts |
|
| The deck design will dictate how you install and secure the deck posts. But be sure the post extends 42 inches above the deck surface to ensure a proper fit with the Postcover. |
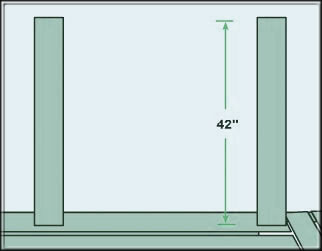 |
| Post should be installed on the inside of the deck frame to allow Postcover to rest entirely on decking. |
 |
| |
 |
| STEP 2 - Mark Center Of Post |
|
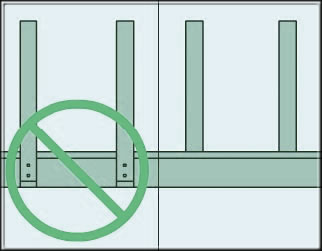
| Once you determine the location of your posts, you need to measure and mark the location of the 2 by 4-inch horizontal rails that will join the posts to form a railing. There are two ways to proceed. |
 |
| First, you can measure up from the deck on one rail to the desired location for the bottom rail and mark the post. Then measure to the desired height of the top rail and mark the post. Repeat those measurements to mark the remaining posts to match. |
 |
| An alternative is to build a rail section to use as a template to measure and mark each of the posts. The template will eliminate the need to measure all of the top rail locations. |
 |
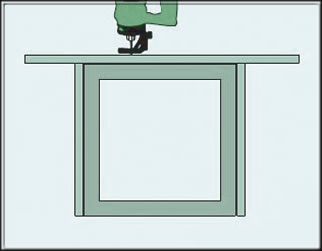
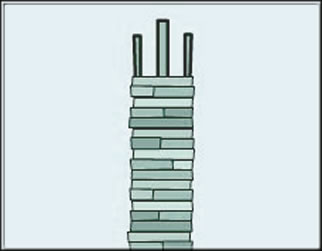
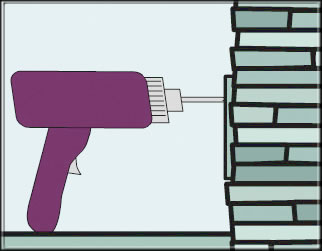
| STEP 3 - Create Template and Cut Postcover |
|
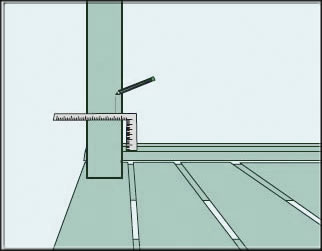
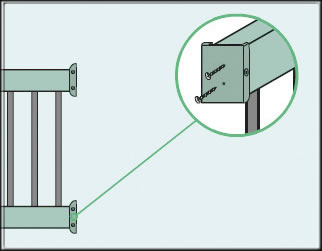
| Cutting holes in the Postcovers will allow you to secure the rail connector to the wooden post, with spacer blocks. You will build a cutting template from plywood and use a router or zip saw to cut precise holes in the Postcovers. |
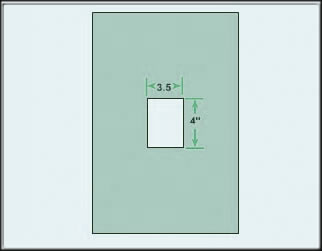 |
| Built a template out of plywood and cut a 3.5-inch by 4-inch hole. Place the hole over the center of the Postcover and mark the outer edges of the Postcover on the underside of the plywood. Rip plywood boards to the width of the Postcover. These will be attached to the plywood template as side arms to hold the Postcover in place while cutting the rail connector holes. |
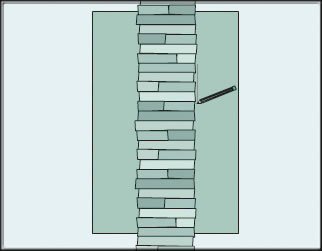 |
| Using a zip saw or a router with a ½-inch bushing guide and a ¼-inch cutting bit, rout the 3.5-inch by 4-inch rail connector holes as measured for the top and bottom rails. The Postcovers can now be fixed in place over the rail posts with shims. |
 |
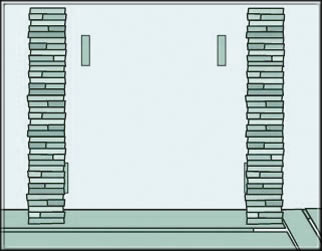
| STEP 4 - Install Postcover |
|
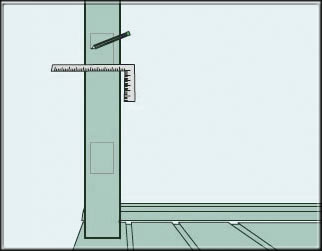
| A 6 by 6-inch treated S4S (smooth 4 sides) post can vary from 5-1/4 to 5-5/8 inches in thickness and may be subject to slight irregularities. You’ll use wood shims at the top and bottom of the post to ensure a snug fit. Slide the Postcover over the post to the deck base. Shim the bottom and then the top of the post for a tight, level fit. It is important to shim evenly on all four sides so that the post remains centered within the Postcover. |
 |
| |
 |
| STEP 5 - Attaching 3.5 x 4 Blocks |
|
| Cut a 3.5-inch by 4-inch piece of stock to make a "spacer block"; it’s best to use the same material as your top and bottom 2x4 rail sections. |
 |
| Using 4 3-inch screws, fasten this block to the 6x6 wooden post through the holes cut in the Postcover during the previous step. |
 |
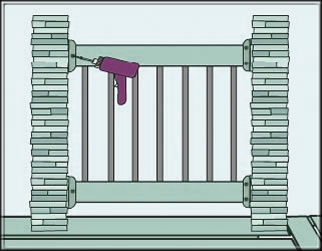
| STEP 6 - Attach Rail |
|
| Using the provided screws, attach the rail connectors to the butt ends of each rail through pre-drilled holes in the connector base. |
 |
| Locate the angled, pre-drilled holes on each side of the post connector and fasten the connector to the wooden post using 3-inch screws. The screws will go through the connector, the 3.5x4 block, and sink into the 6x6 post for a secure fit.
Finish deck railing.
Note: If using Postcover postcaps, use a strong exterior adhesive to secure postcap to the Postcover.
|
 |