| STEP 1 - Measure & Cut |
|
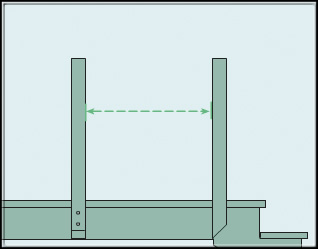
| Measure deck railing openings from post to post to determine the length of each baluster rail section. Cut top and bottom rails to length from your 2 x 4 lumber. |
 |
| STEP 2 - Determine Openings |
|
| Sandwich the rails together for accurate marking of Deckorators baluster location. Mark the center of the board, then mark the board 4-1/2 inches on center, from the center mark out to the ends. This will leave a 3-3/4 inch opening between the balusters. |
 |
| STEP 3 - Baluster Connectors |
|
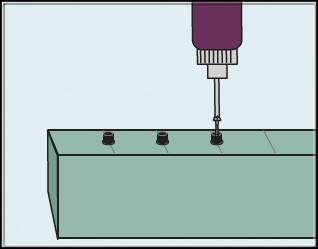
| Install convenient Deckorators baluster connectors, using the stainless steel screws provided. Using a cordless drill, screw connectors in place on each mark. |
 |
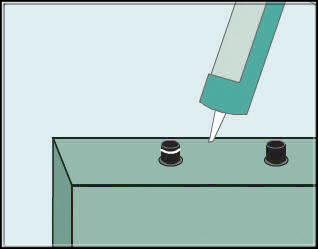
| Apply silicone caulk on each connector to prevent balusters from turning or rattling after installation is complete. The caulk should be on the outside of the connector, where the baluster will make contact with the connector's outer edge. |
 |
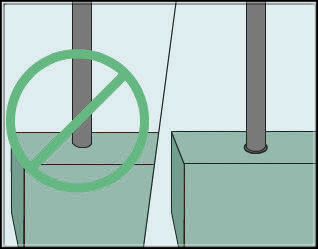
| Avoid direct contact between treated lumber and aluminum balusters with Deckorators baluster connectors to prevent corrosion. Pressure treated lumber will begin to disintegrate aluminum. |
 |
| STEP 4 - Placing Rails |
|
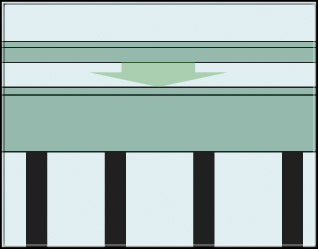
| Place bottom rail between the rail posts, supported by a 1-1⁄2 inch block – 2 x 4 scraps work best.
Secure rail to posts and place balusters over the bottom connectors.
|
 |
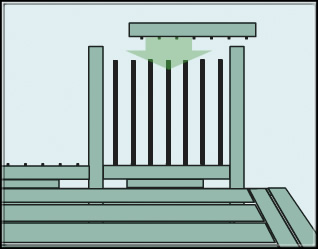
| Carefully place top rail over the balusters, making sure each baluster is seated properly to a connector on the rails. |
 |
| STEP 5 - Inspect |
|
| Inspect finished railing for proper baluster spacing and secure top rail.
Add a rail cap for a finished look.
|
 |
| STEP 6 - Support Blocks |
|
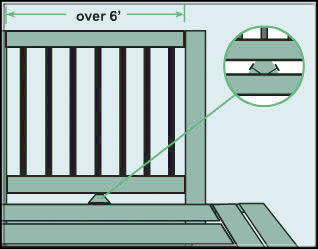
| For rail sections longer than 6 feet, Deckorators recommends adding base support blocks at the center for added structural strength. Toe nail the support block to the bottom rail and deck bottom. |
 |
| STEP 7 - Stair Rail |
|
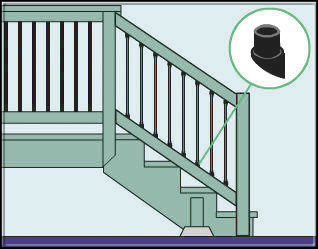
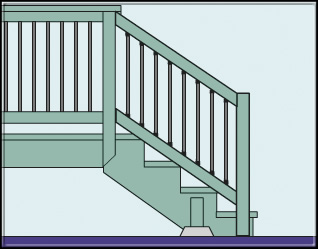
| Stair rails and balusters can present an installation challenge.
DecKorators' angled stair rail connectors create a perfectly snug and accurate baluster fit every time.
First cut top and bottom stair rails at the proper angle. Lay top and bottom 2 x 4 rails alongside the posts and mark.
|
 |
| STEP 8 - Stair Rail |
|
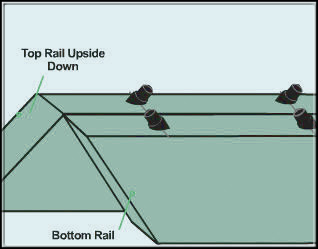
| Sandwich top and bottom rails with the top 2 x 4 turned upside down. Position rails as shown. Mark 5-1⁄2 inches on center, working from the center out to the ends and attach connectors as shown.
|
|
| Top and bottom baluster connectors will be facing opposite directions. |
 |
| STEP 9 - Screwing in Connectors |
|
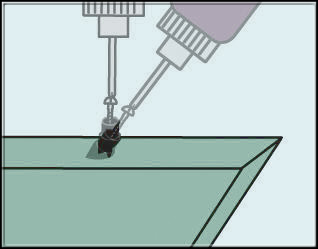
| To properly set angled connectors, begin screwing vertically until the screw bites into the wood. Then reposition screw to right angle and tighten. Do not over-tighten, which can move connector off center. |
 |
| STEP 10 - Assembling Rails |
|
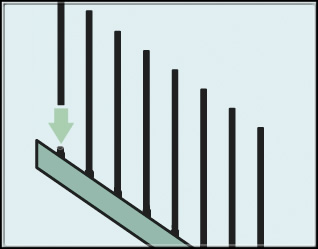
| Make sure connectors are properly lined up, apply silicone caulk to each stair connector, and assemble the top and bottom rails with the balusters. Then attach full rail section between the stair rail posts. |
|
| |
 |