Deckorators Scenic View Glass Baluster Installation Instructions
|
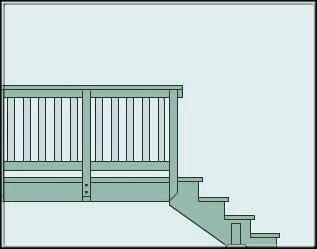
Installing Scenic View Glass Deck Balusters
If your having your deck built or doing it yourself, deck building requires planning and forethought. Even the best deck plans can get off to a bad start if you don’t understand how your deck construction components fit together. Deckorators has created special connection products to make installing the balusters quick and easy. Three easy steps can get your deck rail up and looking good within just a few moments.
Before you use Deckorators Scenic Glass Deck Balusters, check with your local building inspector to verify the product made with 5/16-inch tempered safety glass matches code requirements. Your inspector can also guide you on the proper baluster spacing for deck rail construction.
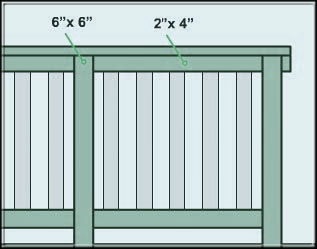
| STEP 1 - Measure & Cut |
|
| Two different rail configurations may be chosen when incorporating Scenic Glass Balusters in your deck project. If you are using 6 x 6-inch posts, twin top and bottom rails should be built with 2 x 4 lumber. |
 |
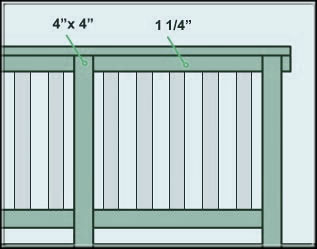
| If you’re using 4 x 4-inch posts, choose 1-1/4-inch lumber for the twin rail construction. |
 |
| |
 |
| STEP 2 - Determine Openings |
|
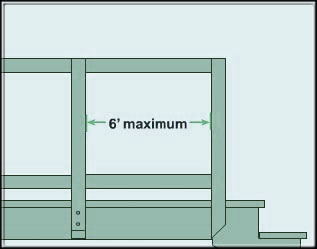
| First measure the rail opening, post to post. Attach outside top and bottom rails to the posts. Scenic Balusters will be installed between two rails on the top and bottom. |
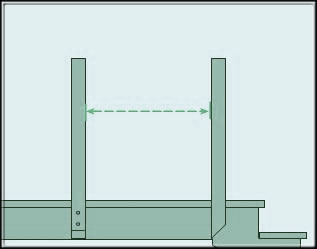 |
| Check local building codes for railing to post attaching guidelines. Keep in mind that 6 feet is the maximum recommended span for railings. |
 |
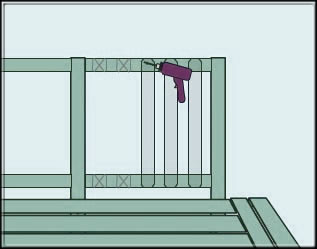
| STEP 3 - Baluster Connectors |
|
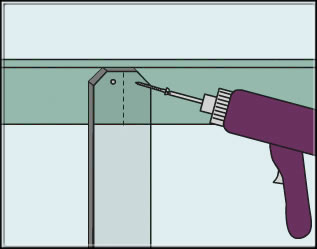
| Measure and mark the center point between rail posts, both on the top and bottom rail. |
 |
| Using a cordless drill, attach the first baluster with the stainless steel screws provided to the inside of the top and bottom rails. Turn screws only until rubber grommet starts to mushroom. Use caution not to overtighten. |
 |
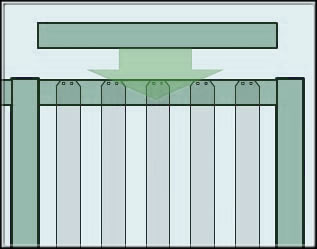
| STEP 4 - Placing Rails |
|
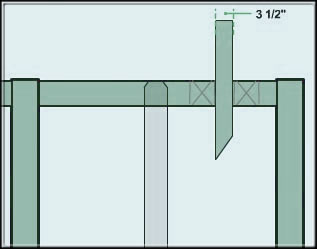
| Choose a separator board, possibly a 2 x 4, which creates a 3-1/2-inch spacing between balusters. Mark for installation of remaining glass balusters. Ideally, spacing will remain consistent across the length of the rails for the best appearance. |
 |
| When you have a pleasing spacing, attach the remaining balusters with provided screws. |
 |
| |
 |
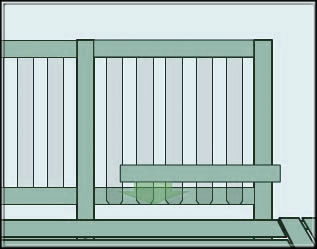
| STEP 5 - Inspect |
|
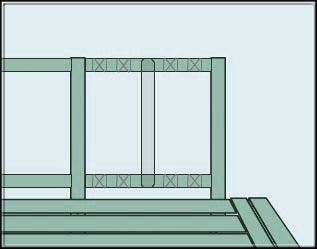
| Install the inside top rail, covering the top of the balusters. This board should be attached directly to the 1st board that has the glass attached to it. It will not attach directly to the scenic glass balusters. |
 |
| Install the inside bottom rail, same as above and add a rail cap to give the railing a professional, finished look. |
 |
| |
 |
|